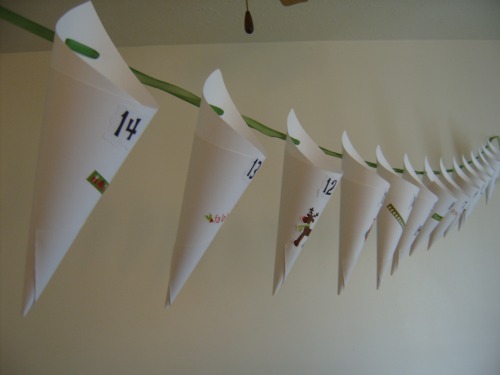
OK so this is done! We'll I still have to add "goodies" to the inside of the cones but I will be doing that during nap time December 1st when I hang it up in the living room. The kids will be very excited when they get up and see it!!

MATERIALS:
12 pieces of 8-1/2" x 11" card stock
Ribbon (you decide how long you want your to be, Mine is 16")
Embellishments (stickers etc for decorating cones)
Glue gun and glues sticks
Hole punch
Scissors
DIRECTIONS:
1. Take 12 pieces of 8-1/2" x 11" card-stock and cut it in half to make it 8-1/2" x 5-1/2".
2. Then roll it into a cone, and secure with a glue gun. This will make 24 cones.
3. Put a piece of tape on the back side top of the cone and then put 2 holes using a hole punch directly across from each other. (The tape will help the cone from ripping).
4. Then decorate the cones any way you like, and add number 1-24 onto cones.
5. Then take ribbon and start string the cones onto it starting with #1 first threading from left to right. Thread 1 then 2 then 3 etc etc until all 24 cones are threaded through the string!
6. Tie ribbon ends and disperse cones evenly.
7. Fill cones with goodies and start counting down December first!

No comments:
Post a Comment